Edisonのファームアップデート
購入後にファームアップデートをしてからだいぶ経ったので、最新はどんなもんかとファームアップデートしてみました。
ちなみに現在のバージョン
root@edison:~# cat /etc/version
edison-weekly_build_68_2014_09_13-49-07
まずは、Supports & DownloadsからYocto complete image をダウンロードします。
EdisonとUSB(J3とJ16)でMacに接続します。
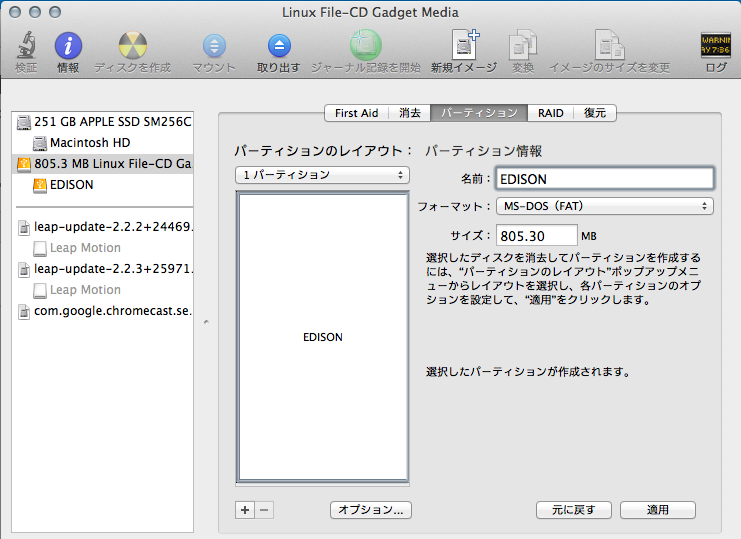
Macにマウントされるので、古いファイルをターミナルからコマンドを叩いて削除します。
rm -rf /Volumes/EDISON/*
rm -rf /Volumes/EDISON/\.*
ダウンロードして解凍したファイルをコピー
cp -r /Users/hoge/Downloads/edison-image-ww05-15/* /Volumes/EDISON/
Edisonにシリアルポート経由でつなぐ
screen /dev/cu.usbserial-A903C2MH 115200 -L
Edisonの再起動
reboot ota
これで、先ほどコピーしたファイルでファームのアップデートがされます。
再起動が終わってみてバージョンを確認してみると
root@edison:~# cat /etc/version
weekly-120
root@edison:~# uname -a
Linux edison 3.10.17-poky-edison+ #1 SMP PREEMPT Fri Jan 30 14:16:35 CET 2015 i686 GNU/Linux
バージョン表記がずいぶんさっぱりと・・。
初期化してしまったので、パスワードやらWi-Fiの設定が消えてしまっているので、設定をします。
前回は、configure_edisonと実行すると、Q&A形式で設定できたけど、その辺の仕様は変わったらしい。
引数で何を設定するか指定しないとダメなようだ。
root@edison:~# configure_edison
usage: configure_edison [-h] [--server]
                        [[--setup | --name | --password | --wifi]
                        [--showWiFiIP | --version | --latest-version | --upgrade | --disableOneTimeSetup | --enableOneTimeSetup | --flash <version> [<release name> ...]
                        | --flashFile <image-file> | --showNames]

optional arguments:
  -h, --help            show this help message and exit
  --server              Starts the server (testing only)
  --setup               Goes through changing the device name, password, and
                        wifi options
  --name                Changes the device name
  --password            Changes the device password
  --wifi                Changes the wifi options
  --showWiFiIP          IP address associated with the wireless interface
  --version             Gets the current firmware version
  --latest-version      Gets the latest firmware version
  --upgrade             Downloads the latest firmware
  --disableOneTimeSetup
                        Disable one-time setup and WiFi access point
  --enableOneTimeSetup  Enable one-time setup and WiFi access point
  --flash <version> [<release name> ...]
                        Downloads and flashes an image
  --flashFile <image-file>
                        Flashes the given image (.zip).
  --showNames           Show device name and SSID
--setupオプションを指定すると、ウィザード形式で登録出来ました。
root@edison:~# configure_edison --setup

Configure Edison: Device Password

Enter a new password (leave empty to abort)
This will be used to connect to the access point and login to the device.
Password:       *********
Please enter the password again:        *********
The device password has been changed.

First-time root password setup complete. Enabling SSH on WiFi interface.

Configure Edison: Device Name

Give this Edison a unique name.
This will be used for the access point SSID and mDNS address.
Make it at least five characters long (leave empty to skip): hoge_edison
Is hoge_edison correct? [Y or N]: y

Do you want to set up wifi? [Y or N]: y

Configure Edison: WiFi Connection

Scanning: 1 seconds left

0 :     Rescan for networks
1 :     Exit WiFi Setup
2 :     Manually input a hidden SSID
3 :     hoge
4 :     fuga
5 :     hogehoge
6 :     fugafuga
7 :     hogefuga
8 :     fugahoge


Enter 0 to rescan for networks.
Enter 1 to exit.
Enter 2 to input a hidden network SSID.
Enter a number between 3 to 9 to choose one of the listed network SSIDs:
Is hogehoge correct? [Y or N]: Y
Password must be between 8 and 63 characters.
What is the network password?:
Initiating connection to hogehoge. Please wait...
Attempting to enable network access, please check 'wpa_cli status' after a minute to confirm.
Done. Please connect your laptop or PC to the same network as this device and go to http://192.168.0.2 or http://hoge_edison.local in your browser.
これで無事ネットに繋がる
root@hoge_edison:~# curl -I http://yahoo.co.jp

HTTP/1.1 301 Moved Permanently
Server: nginx
Date: Sat, 07 Mar 2015 09:01:13 GMT
Content-Type: text/html
Connection: close
P3P: policyref="http://privacy.yahoo.co.jp/w3c/p3p_jp.xml", CP="CAO DSP COR CUR ADM DEV TAI PSA PSD IVAi IVDi CONi TELo OTPi OUR DELi SAMi OTRi UNRi PUBi IND PHY ONL UNI PUR FIN COM NAV INT DEM CNT STA POL HEA PRE GOV"
Location: http://www.yahoo.co.jp/
Cache-Control: private
Vary: Accept-Encoding
X-Frame-Options: SAMEORIGIN
gitなども消えてしまったので、インストールしていきます。
こちらのサイトでお勧めなパッケージリストが公開されているのでそれをありがたく使います
http://nonnoise.github.io/Edison/
curl http://nonnoise.github.io/Edison/_sources/Edison/base-feeds.conf -o /etc/opkg/base-feeds.conf
curl http://nonnoise.github.io/Edison/_sources/Edison/intel-iotdk.conf -o /etc/opkg/intel-iotdk.conf
curl http://nonnoise.github.io/Edison/_sources/Edison/mraa-upm.conf -o /etc/opkg/mraa-upm.conf

opkg update
opkg upgrade
gitを入れる
opkg install git

root@hoge_edison:~# git --version
git version 1.9.0
vimを入れる(結構時間かかった)
git clone https://github.com/b4winckler/vim.git
cd vim
./configure --with-features=huge
make
make install
bashを入れる
opkg install bash

root@hoge_edison:~# cat /etc/shells
# /etc/shells: valid login shells
/bin/sh
/bin/bash
bashをデフォルトにする
chsh -s /bin/bash
よく使うエイリアスを指定
vim .bashrc

alias ls='ls --color=auto'
alias ll='ls -la --color=auto'
alias rm='rm -i'
alias vi='vim'
ログインした時にbashrcが読み込まれるように
vim .bash_profile

if [ -f ~/.bashrc ]; then
. ~/.bashrc
fi
npm install aws-sdk
これで、だいたい元に戻った。

